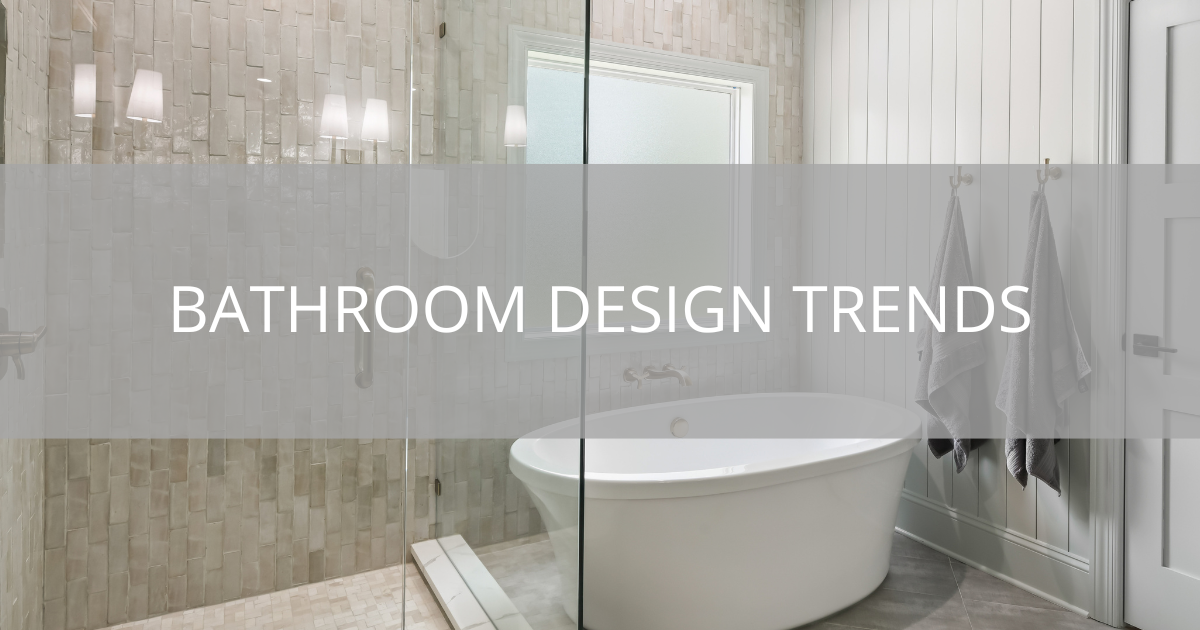
Featured Image: Phillips Brothers Contracting Inc.
A shiplap bathroom project can be as broad in scope or subtle as you want. A shiplap can make a significant impact in an unexpected, understated manner. However, the bathroom frequently gets overlooked in favor of more scene-stealing rooms in the house. The bathroom is where you cleanse and revitalize, and no doubt restore calm and peace after a tough day at work. Check out these shiplap bathroom design ideas and learn how to amp up your bathroom in no time!
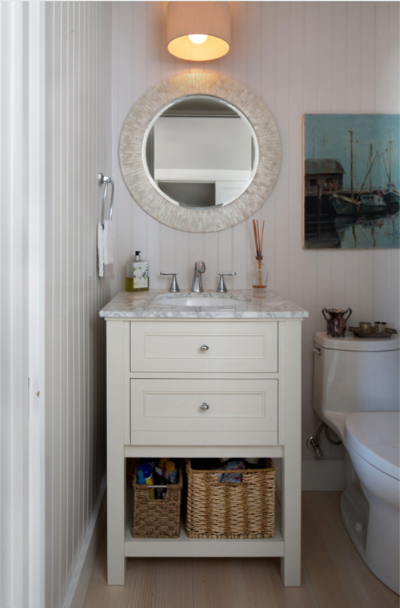
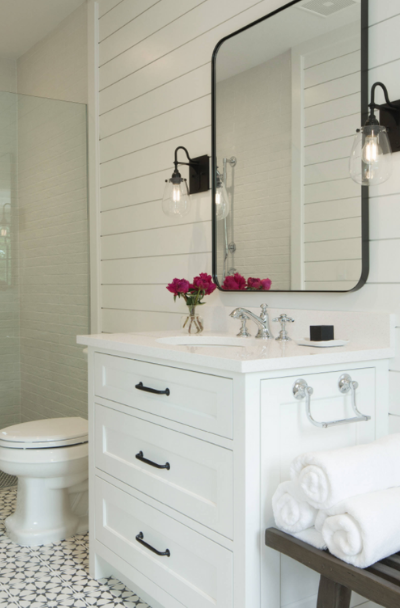
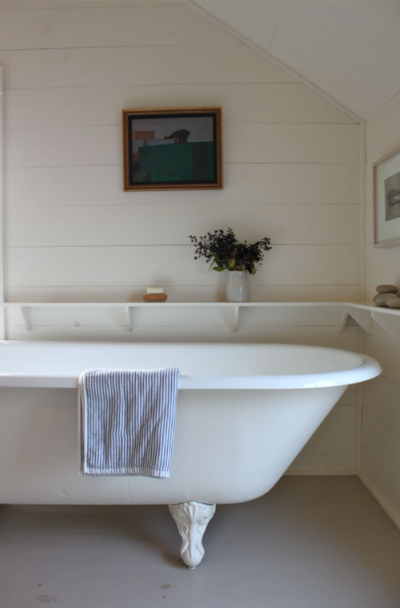
COOL OLD SINK

The combination of a rustic barn door and shiplap siding in this bathroom by Paradigm Renovation creates a farmhouse-inspired look, while the modern freestanding tub and glass-enclosed shower add a touch of luxury.
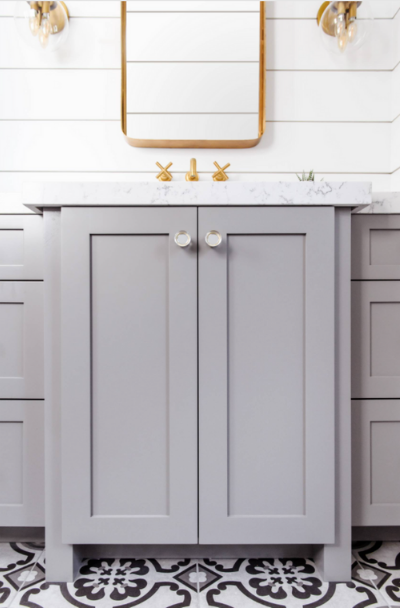
WATERFRONT
This contemporary bathroom by Avalon Associates, Inc. features a stunning vertical shiplap wall as a backdrop for the sleek floating vanity and modern fixtures, creating a sophisticated, minimalist space.
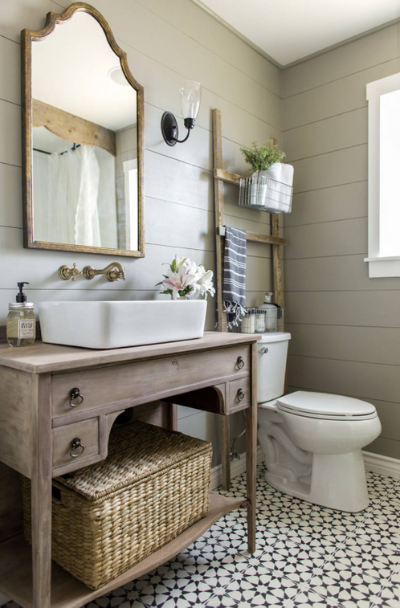
HILLSIDE

The shiplap-clad ceiling in this bathroom by Younger Homes adds a unique architectural element, while the freestanding tub and oversized mirror create a sense of elegance and openness.
TRENDY
This coastal-inspired bathroom by Anne Michaelsen Design showcases a horizontal shiplap feature wall that brings a beachy vibe, complemented by the neutral color palette and natural wood accents.
POWDER ROOM
The white shiplap walls in this bathroom by Urban Trend Builders LLC create a dramatic and cozy atmosphere, while the floating vanity and recessed lighting add a touch of modern sophistication.
WHITE PINE

This rustic bathroom by Celtic Custom Homes embraces the charm of shiplap siding with its whitewashed walls and reclaimed wood vanity, while the copper fixtures and stone countertop add warmth.
BASEMENT

The shiplap accent wall in this bathroom by Hart & Lock Design is a focal point, providing a backdrop for the contemporary freestanding bathtub and sleek floating vanity.
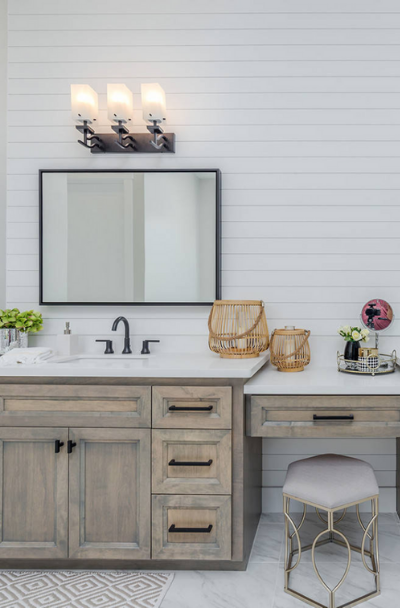
FARMHOUSE
This light and airy bathroom by TOTAL CONCEPTS features a shiplap-clad wall that adds texture and visual interest, while the white subway tile and glass shower enclosure creates a fresh and modern look.
COUNTRY HOME
The vertical shiplap siding in this bathroom by Patterson and Smith Construction, Inc. creates a sense of height and adds a touch of farmhouse charm. At the same time, the black accents and marble countertop lend a sophisticated and luxurious feel.
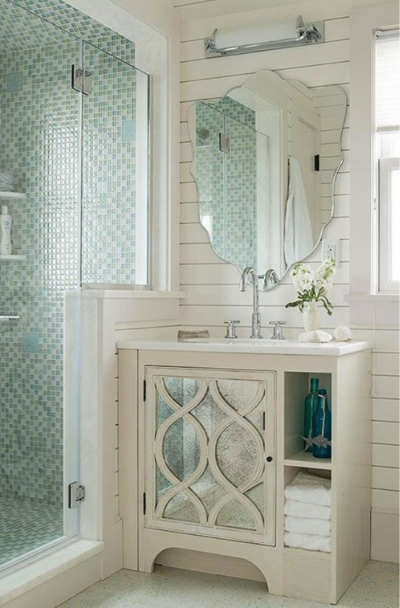
DIMINUTIVE
This eclectic bathroom by John R. Schroeder, AIA combines a shiplap feature wall with vibrantly patterned tiles, creating a visually beautiful space with a mix of textures and styles.
Why Go For A Shiplap Bathroom
Besides simple installation and low cost, shiplap has turned into a favorite bathroom decor element resulting from its brilliant, revitalizing appearance. While white shiplap is probably the most common, you can also choose to paint an alternative hue to match your bathroom style. Initially, shiplap (wooden board) was utilized as an exterior siding for construction reasons. It was usually used on outdoor structures, barns, and sheds. With shiplap wood, you can join two flat pieces tightly to make a flat surface. This tongue and groove technique gives your wall a lovely beachy theme and rustic appearance. However, the final result is dependent on how you install shiplap (full or half), the board type, and the shades used.
As a result of the stunning look it provides, shiplap has turned into a favorite bathroom decor component nationwide. Even though you can use shiplap in any area, it is most prevalent in bathrooms and kitchens. If you want to install a shiplap and do not want it to cover the whole wall, you can use it to generate an accent wall. With this, you can add some visual energy and drama to your bathroom without committing a hundred percent of your wall space. Covering your whole bathroom wall with shiplap can help change your bathroom altogether and give it a new look. This option is most well-known in rustic and farmhouse bathroom designs. With a full installation, you will feel as if you are walking right into a beach house or cozy cabin any time you step into your bathroom.
Although the most popular color choice for shiplap boards is white, you can pick any color you want. If colored shiplap is not your thing, choose white. White is not just striking and classic; it also complements most bathroom fixtures. You can use shiplap to hide marred ceilings or dirty walls since you can put it on many surfaces. To set your bathroom apart, attach a chandelier for a beautiful finish. Wallpaper could be an inexpensive and easy way to put in a fun design for a drab bathroom. Rather than wallpapering the whole bathroom, consider using a shiplap backsplash to balance the design.
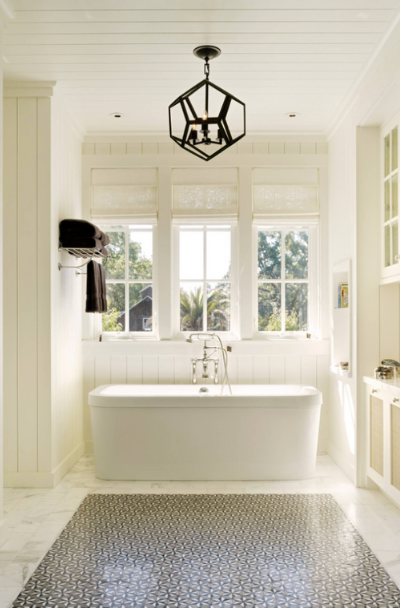
CLASSIC DESIGN
The shiplap-clad bathtub surround in this bathroom by Kisel Construction exudes rustic elegance, while the large windows and pendant lighting fill the space with natural light, creating a serene and inviting atmosphere.
RUSTIC
This contemporary bathroom by Conklin Architecture combines shiplap siding and geometric tiles, resulting in a visually intriguing and modern aesthetic that balances warmth and sleekness.
MOUNTAINSIDE
The white shiplap walls in this bathroom by Studio McGee create a bright and airy atmosphere, while the vintage-inspired fixtures and patterned floor tiles add a touch of nostalgia and character.
TRANSITIONAL
This industrial-inspired bathroom by ADELE LAPOINTE LLC showcases a shiplap accent wall with a weathered finish, creating a unique backdrop for the minimalist vanity and exposed bulb lighting.
Tips In Having Shiplap In Bathroom
If you’re remodeling your master bathroom and want to give the space a much-needed character and texture, add shiplap in bathroom to attain that look. Several people are hesitant about putting shiplap in bathroom due to moisture and general wear and tear concerns, but we are here to tell you that shiplap works great in any space, even the bathroom. As long as there are proper initial sealing and routine inspection and maintenance, a shiplap in bathroom will last for quite some time. In high moisture rooms such as the bathroom, kitchen, or home’s exterior, it is crucial to seal your wood material adequately. End grain is the main culprit for eventual wood rot and water infiltration. End grain gets exposed when you cut the board; the wood grain will be running perpendicularly to your cut. You have to seal all cut ends for each panel that you install in a high moisture area. Furthermore, you will have to ensure you fill nail gaps with drywall compound. After this initial filling material dries in the nail holes, sand it, fill it again, and sand once more when dry. Prime the drywall compound with a thin layer of primer before applying finish paint to the wood. Two finish coats are required to protect any material completely, interior and exterior.
If you have been considering painting your bathroom, you might be aware of references to a particular paint type called bathroom paint. You may believe that this is distinct from regular interior house paint created for bathrooms only. In reality, there’s no such thing as bathroom paint, but you will find paints formulated for better performance in the wet environment of bathrooms. Why are bathrooms hard on paint? Bathrooms are wet, and as a result, moisture should be your primary problem when laying down a fresh paint on your walls. Moisture can affect your shiplap bathroom walls in two ways. Moist air from steamy showers and baths collects on the walls. Then, water from the sink, shower, or bath that splashes onto the wall space.
Moisture can damage paint when it permeates the paint layer and contacts the drywall or plaster surface underneath. This may lead to peeling paint and mildew growth. How do paints resist moisture? The very best aspect of moisture resistant paint for bathrooms is they provide you with the choice of extra paint sheens. While standard paints should be high-gloss, semi-gloss, or satin in the bathroom, specially formulated paints can be more matte or flat. When it comes to costs, moisture resistant paint for bathrooms tends to be at the high-end of interior paints, excluding overpriced designer paints. You can look to spend approximately as much as, or a bit more than, regular premium paint, or about fifty to sixty dollars per gallon. The best part is, you will get top-quality paint that is designed to last in the bathroom. And fortunately, bathrooms are relatively small; therefore, it typically takes much less than a gallon for two coats.
COASTAL CHIC
Cambria‘s shiplap ceiling in this bathroom adds architectural interest and visual appeal, while the neutral color scheme and natural materials create a tranquil and spa-like ambiance.
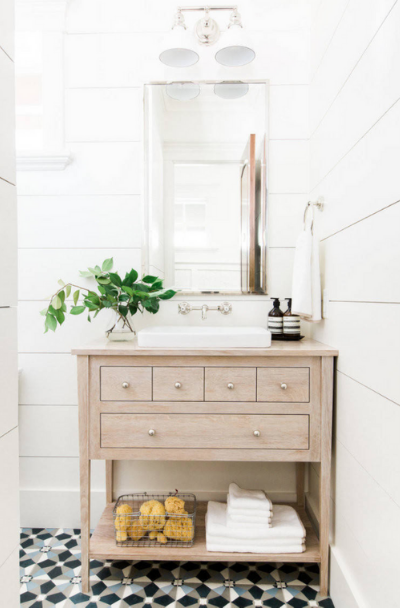
WHITE WALLS
This farmhouse-style bathroom by Savvy Interiors embraces the charm of shiplap siding with its whitewashed walls and vintage-inspired fixtures, while the clawfoot bathtub adds a touch of elegance.
SATIN FINISH
The shiplap feature wall in this bathroom by Jenna Sue Design Co. is a canvas for the striking black vanity and brass accents, creating a contemporary and sophisticated space with a hint of glamour.
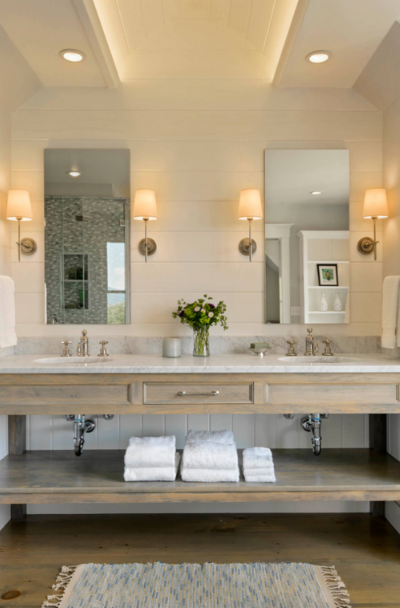
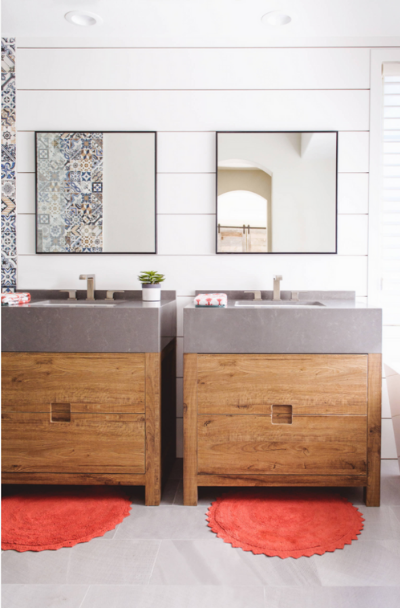
DOUBLE SINK

This coastal-inspired bathroom by Fletcher Development LLC features a shiplap accent wall that evokes a sense of relaxation and serenity, while the light wood vanity and nautical decor complete the beachy aesthetic.
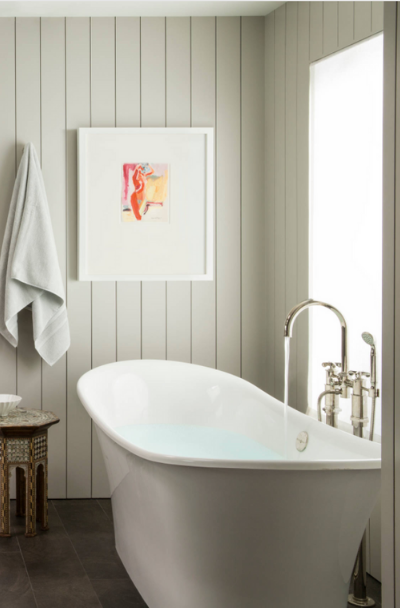
SINUOUS CURVES
This bathroom by Griffin Enright Architects shiplap walls that create a moody and dramatic atmosphere, while the brass fixtures and marble countertop add a touch of luxury and elegance.
HARBOR
This minimalist bathroom by Justine Hand showcases a shiplap-clad shower enclosure that blends seamlessly with the white subway tile.
The Best Way To Install Shiplap Bathroom
After seeing multiple inspirations online for a shiplap bathroom wall, you now want to have it. However, you don’t know how to shiplap a wall, but don’t worry because below are listed the following steps you need to have that gorgeous shiplap bathroom wall. The first thing you must do to install shiplap is to measure the area. Check the size of the structure you want to cover. Plywood comes in 8′ by 4′ sheets. Find out the number of sheets of plywood you will need to cover your wall. It is better to purchase more instead of having not enough. You would probably want to buy five pieces for an 8′ high and 11′ long wall. This might leave you with one additional sheet of plywood. Put it aside without painting it, and you can either utilize it or send it back if you do not need it. After knowing the measurements and buying the wood, you can now paint the wood.
Usually, you wouldn’t begin a project by painting; however, in this situation, it is less of a challenge to paint your plywood shiplap just before cutting it. You will only have to paint one side of the wood; let it dry before cutting. Don’t forget to keep that last sheet of plywood unpainted. You may use it, but if you don’t, you can’t return it anymore if it is painted. The third step is to cut shiplap strips. It is up to you to figure out how wide you want your shiplap “boards” to be. Anywhere between 5″ and 6″ is pretty standard. Utilizing the same width for all your boards will make this particular task much more manageable.
There are two things you must think about before installing the boards. You want to generate as little waste as possible, simultaneously ensuring that your boards’ pattern is not repetitive. You do not need one seam running the entire length of the structure. Use a stud finder to find each 2×4 stud in the wall, and mark their places with a pencil and a 4′ level. The studs should be approximately 16″ apart. Cut your boards to lengths matching the position of every stud. Use your leftover pieces as frequently as possible to reduce waste. You can create whatever design you like, as long as the seam where two boards meet is not resting on top of the previous row’s seam.
ARTISAN

A vertical shiplap feature wall in this bathroom by Grace Hill Design creates a sense of height and adds a touch of rustic charm. At the same time, the freestanding soaking tub and oversized windows invite natural light for a relaxing bathing experience.
CORNER SHOWER
The shiplap-clad ceiling in this bathroom by Sellars Lathrop Architects, llc adds a unique and unexpected design element, creating a cozy and inviting atmosphere. At the same time, the modern vanity with a marble countertop and sleek fixtures brings a contemporary touch to the space.
Steps In “Nailing” Your Shiplap Bathroom
Starting at the floor makes spacing your panels simpler. Put your first board along the edge of the floor and ensure it is level. Use a finish nailer to connect the board on the wall at the place of every stud. A nickel can act as a spacer between every panel in a run and in between each run. Regularly make sure your boards are level. Because you have created all of your cuts in advance, this technique has to go relatively fast. Cut around the obstacles. At the very least, you’ll have some electrical outlets in your wall to deal with. Utilize a screwdriver to remove each outlet cover. You do not have to be precise. Use a saw to cut across the outline. Don’t worry about the uneven slices because they can be concealed with the outlet cover once you are done. You may have to make some other cuts or adjustments to cater to windows, doors, or trim.
After you have installed your boards, you will have some finishing touches to add. Since you have painted the panels before cutting them, the edges will surely be unpainted. Use caulk to fill up any unwanted holes. Let it dry, and use a small brush to paint your shiplap boards’ raw edges. Since the shiplap is 1/4″ thick, you will have to bring your switches and outlets out 1/4″. This may be easily accomplished using several small washers. Safety first! Turn off the power at the breaker. Utilize a screwdriver to detach the outlet from the box and place one or two washers on the small bolt before reattaching it. This can ensure your outlet is even with your wall structure and outlet cover. Do the same for just about any switches. Attach the outlet covers and turn the power back on.
Before America discovered drywall for bathroom, interior home partitions were made of stone, wood, plaster, lath, mud, and concrete in different combinations. Drywall is cheaper, much more convenient, and much easier to work with. It is widely used for ceilings and walls, but it is not a waterproof material. As it is naturally lightweight and porous, it is easy for liquid to seep through and develop mold. When you are thinking about drywall for bathroom, you need a couple of additional steps to avoid water damage. For example, your drywall can be combined with plasticizers, foam, and other materials. These substances make your drywall less flammable and lessen the risk of mildew and mold. The additives also help your drywall take in less water, a key feature for bathroom use. Drywall is favored because you can easily install it for emergency repairs. It is designed to be porous, making it light during construction, much easier to work with, and more affordable to transport. No matter where you are setting it up, drywall is preferred to brick, wood, stone, concrete, and even plaster. You can quickly cut it; thus, sizing, positioning, and framing are much more manageable. It is budget-friendly, and even if you do not purchase fireproof versions, gypsum withstands flame better than many other construction materials. This is because gypsum has a large amount of intrinsic moisture, approximately 50%. Perhaps the most significant advantage of drywall is insulation. The porous fibers encourage capillary movement; thus, liquids pass through them quickly. But those pores discourage the loss of heat. Thus, it keeps your home warmer and lowers utility bills. Drywall will also cool down slower; therefore, it can get stuffy during warmer months.
This is an image roundup post, curated to showcase and promote other reputable contracting companies’ and their amazing work. To have any of the images removed, please reach out to us and we would be happy to do so.